With Cursor connected to the Smartsheet MCP server, you can interact with your Smartsheet data using natural language.
Required plan: Business, Enterprise, or Advanced Work Management
Here's how to set up the Smartsheet MCP server in Cursor.
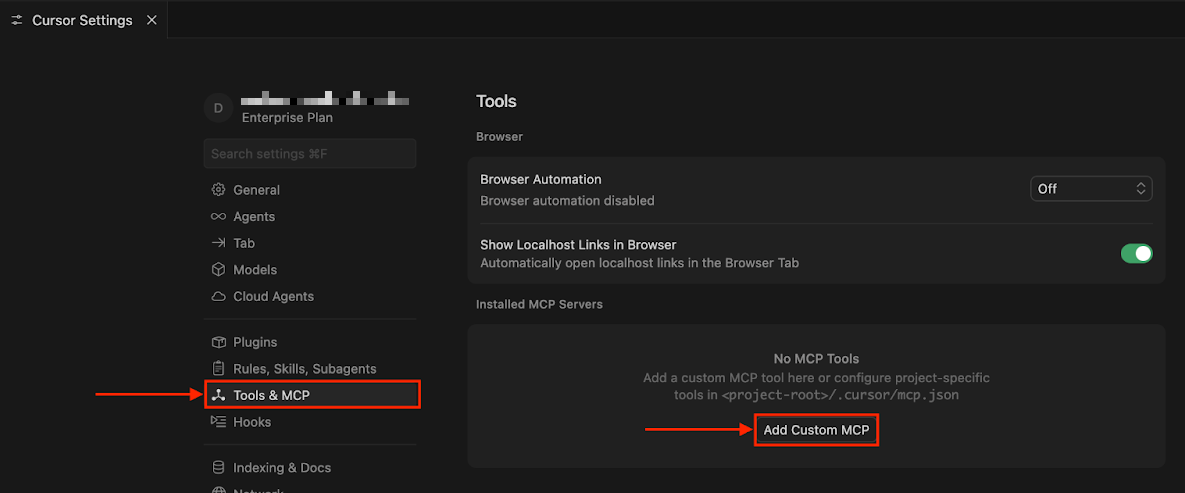
Select Settings (gear icon), in the top corner of the Cursor application. Your Cursor settings appear.
Go to Tools & MCP, and select Add Custom MCP.
An
mcp.jsonfile editor tab displays a JSON object that has anmcpServerselement.{ "mcpServers": {} }In the
mcp.jsonfile, specify the Smartsheet MCP server connection.For example,
{
  "mcpServers": {
    "smartsheet": {
      "command": "npx",
      "args": [
        "-y",
        "mcp-remote",
        "https://mcp.smartsheet.com",
        "--header",
        "Authorization:${env:SMARTSHEET_API_TOKEN}"
      ]
    }
  }
}
Replace:
- the
smartsheetserver name with a name you're using for the server. - the URL with your region's URL, if you're using a regional server outside the US.
${SMARTSHEET_API_TOKEN}with the environment variable for your Smartsheet API token.
Save your changes.
- the
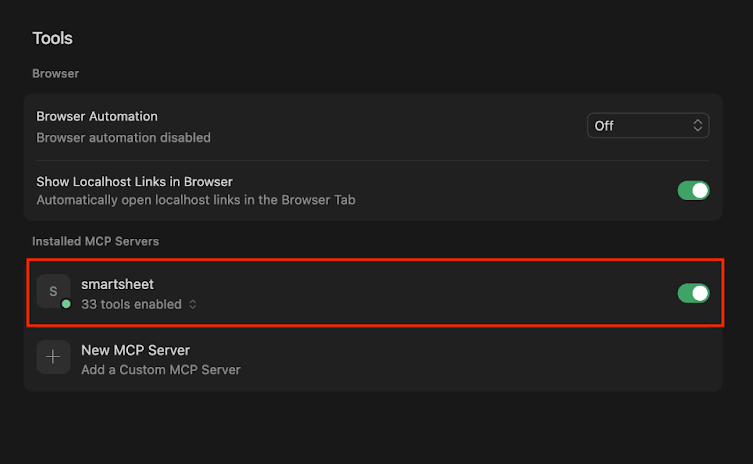
Go back to the Cursor Settings tab. Your MCP server appears under Installed MCP Servers.
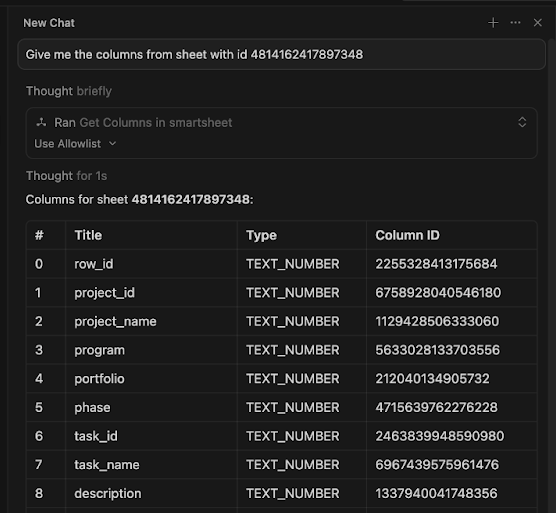
Start a new chat by selecting New Agent in the side navbar, and test the Smartsheet MCP server with a prompt.
You're ready to develop in Cursor with the help of the Smartsheet MCP server.
Now that you've connected to the Smartsheet MCP server, you can interact with your Smartsheet data in a conversational way.
Check out the example prompts in Smartsheet MCP prompt cookbook.
Want to learn more about the MCP server's capabilities? Visit Smartsheet MCP server tools.